After finishing our nocturnal adventure, we started digging. It is generally
my practice, no matter what part of the extensive spoil piles, to dig down to
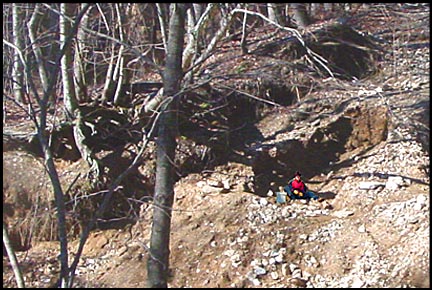
a layer of rock that has not seen the light of day since it was dumped by the miners. It is intuitively obvious that there is more chance of finding goodies in rocks that have gone untouched by other rockhounds. However, getting down to the proper depth can be extremely challenging for several reasons: 1) the spoil piles can be up 10 feet deep; 2) less experienced or physically unable rockhounds have pushed rock and debris down slope burying the untouched rock even deeper; and 3) there are many large boulders at depth that have to be busted up in place just to move.
The digging itself is pretty basic pick and shovel work that requires no explanation - other than to say that it is BRUTAL. However, there are different techniques to find beryl and other minerals. Some rockhounds will
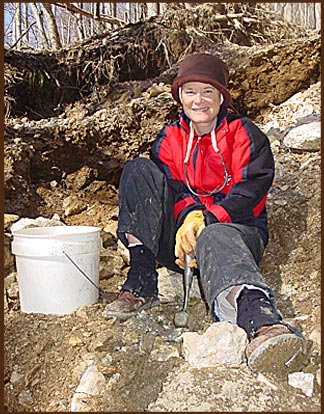 screen all the finer grained material that they dig up to find loose crystals. This is done either in water obtained from the nearby creek or in the creek itself. As I mentioned above, my method of choice involves digging down to the untouched rock where there is little to no finer grained material. It has been my experience that the very best layer is where the rocks and boulders look as though they had been dumped by miners, washed by rain and then buried beneath more rocks many decades ago. The best beryl in matrix specimens that I have found were recovered in rocks that required no washing to see the crystals. However, the untouched rock layers are not always free of finer material, including dirt, that sticks to the rocks, thus masking the minerals. In this case, each pegmatite rock recovered must be washed in water to remove the dirt. Chrissy and I work as a team whereby I dig 'em up and she washes 'em in a bucket of stream water. I will periodically stop digging to bust apart all the larger rocks and boulders and will sometimes find good stuff hiding inside. I will also carefully cob the rocks that are showing beryl and other minerals. Proper cobbing, so as to not destroy a specimen, takes experience, patience, nerve and a bit of luck. Some suggest that it would be better to take a rock home to employ some sort of hydraulic rock splitter for cobbing, but the size of the boulders and the 1/2-mile hike back to the truck makes this an undesirable option for me. Knowing when to stop cobbing so that you don't ruin a specimen also takes experience along with discipline. No doubt, I have ruined many a specimen by giving it one too many whacks in an attempt to make it "perfect". But, the way I figure it, you have to lose a few to get a few and I prefer to do my losing in the field. Sometimes luck is squarely on our side, as was case this day.
Early afternoon, I pulled out a 30-pound boulder that contained what
 appeared to be two large beryl crystals barely showing on one side. I didn't take a picture of it at the time, but for illustration purposes, I used a photo editor to recreate its approximate appearance (see picture to left). As I often do, I put the rock aside to cob later. I have learned that it can be better to let the adrenaline rush from finding a potential good specimen subside before attacking it with a hammer.
After about an hour, I decided it was time to cob. I began hammering the boulder as far away from beryl as possible. I used the feldspar's cleavage to my best advantage to slowly remove waste rock and hopefully uncover the crystals. Exploiting cleavage and a pegmatite's natural fractures and other weaknesses
without ruining a specimen by either knocking out or shattering beryl crystals is almost an art that one day I hope to master. Somehow, with carefully-directed blows, I managed to uncover enough of the beryl to realize
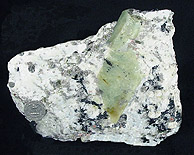 that it was actually a single crystal, instead of two as I had previously thought. Yowzer! The smaller end of the crystal was almost fully exposed, but the bottom wider end was still mostly covered with rock. Again, I used a photo editor to recreate the approximate appearance of the specimen at this point (see picture to right). It was a nice specimen just as it was and I decided to not push my luck by whacking on it any more . . . at least until I changed my mind a half hour later (welcome to my compulsive world).
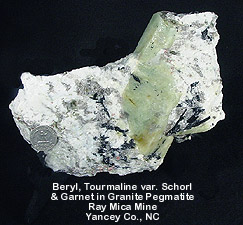
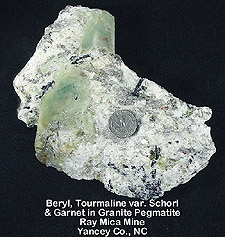
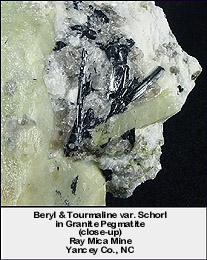
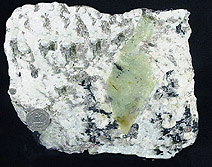
With Chrissy seeming to wince and sometimes look away with each hammer swing, I attempted to remove just a bit more matrix and expose more of the fat side of the beryl crystal. Just about the time that I thought that the rock would never cooperate and I would be forced to give up and be satisfied with what I had, a small crack emerged on its surface. "Uh, oh", I said, much to Chrissy's chagrin. "Now I've done it", thinking that I had messed up another one. Not really knowing exactly what would happen and fearing the worst, I slipped a thin chisel blade into the crack and pried it apart. "Oh, my God!", I exclaimed as I held up and turned over the top portion of the boulder with the entire beryl crystal perfectly attached, intact and greatly exposed. The rock could not have broken off any better, and we ended up with a relatively thin plate that contained the big beryl, a small side beryl and splashes of shiny black tourmaline. I could hardly believe my luck as I had no idea whatsoever that the rock was going to break the way it did. The real-life final specimen is pictured below.
 days, mica was used as windows for houses and heaters. Muscovite is still used
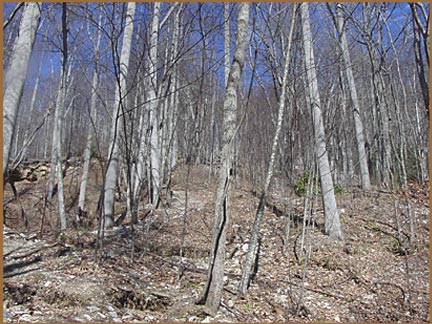
today as insulating material in electrical equipment, in paints to increase weatherability and to reduce running, in the manufacture of wallpapers to give them a silky or shiny luster, in the manufacture of lubricants and in dry-powder fire extinguishers. The Ray mine was closed and reopened many times throughout the years until the Wray mining company abandoned it as unprofitable in May 1944 after the U.S. Geological Survey mapped the mine as part of the Strategic Minerals Investigation Program. What remain today in the heavily forested area of Yancey County are extensive spoil piles that extend down a
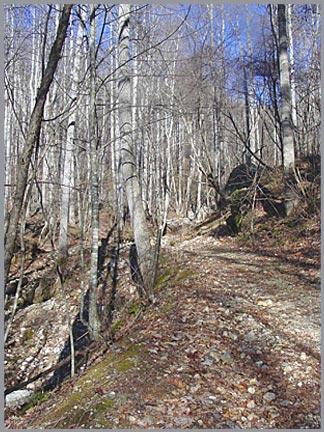
steep slope from the crest of a divide to an unnamed creek that flows over and under jagged pegmatite rocks.
days, mica was used as windows for houses and heaters. Muscovite is still used
today as insulating material in electrical equipment, in paints to increase weatherability and to reduce running, in the manufacture of wallpapers to give them a silky or shiny luster, in the manufacture of lubricants and in dry-powder fire extinguishers. The Ray mine was closed and reopened many times throughout the years until the Wray mining company abandoned it as unprofitable in May 1944 after the U.S. Geological Survey mapped the mine as part of the Strategic Minerals Investigation Program. What remain today in the heavily forested area of Yancey County are extensive spoil piles that extend down a
steep slope from the crest of a divide to an unnamed creek that flows over and under jagged pegmatite rocks.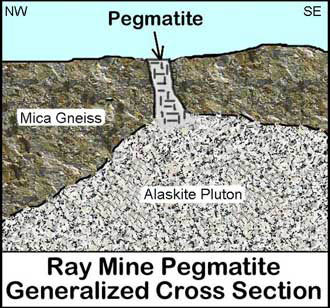
 In the southern Appalachians, this final period is marked by continued regional uplift accompanied by extensive subaerial erosion.
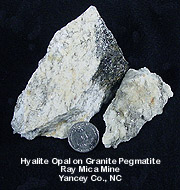
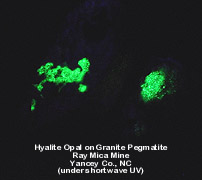
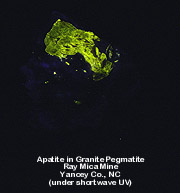
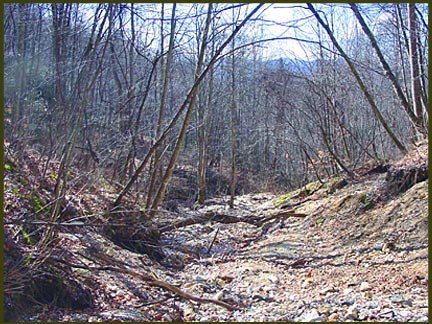 Mine minerals fluoresce under shortwave ultraviolet light, including apatite (pale yellow), hyalite opal (bright green) and fluorite var. chlorophane (pale bluish purple). We thought that it would be a hoot to bring along our ultraviolet lamp to light up and locate these minerals, but this had to be done in the dark.