
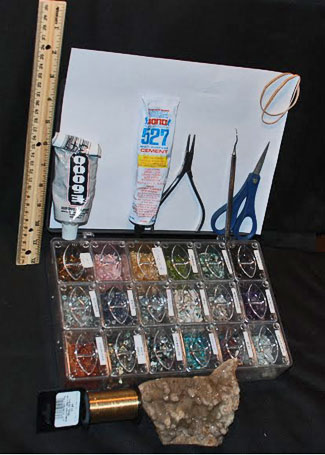
The supplies for this project include the following: wire (24-26 gauge); tiny gem stones, E6000 and 527 glues; base rock; round nose pliers; ruler or some measuring device; scissors; rubber band(s).
|
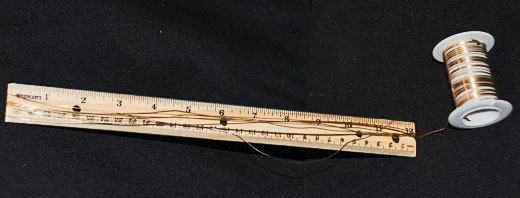
Hold the end of wire to one end of ruler and wrap wire around it at least six times - for fuller tree wrap use more - for this demonstration I wrapped the ruler 9 times.
|
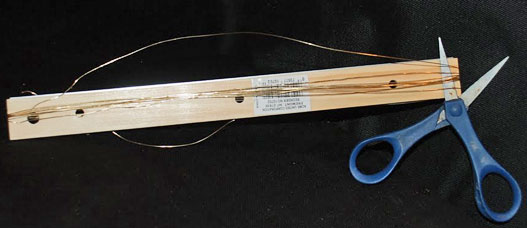
Cut the wire at each end of ruler - in this project, I used 18 wires, each 12 inches long. You can make a jig with a board and headless nails and make the wires whatever length you desire - the longer the wire however the more wraps or the tree may look a bit too spindly.
|
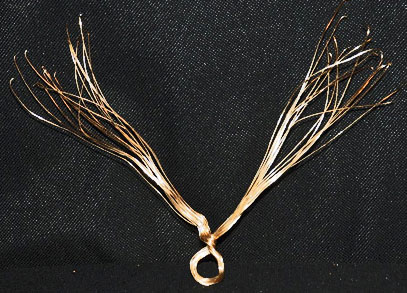
Hold the wires in the center and make a twist - the loop at the end will become the roots of the tree.
|
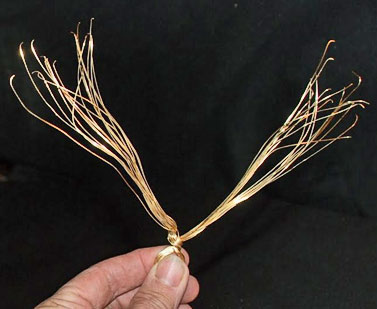
The ends of the wires will become the limbs.
|
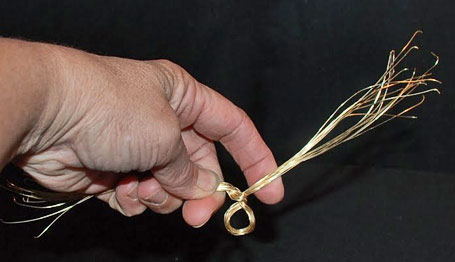
Hold the wire and twist the two halves together to form the trunk of the tree - how tall you want your trunk depends on the number and length of wire you use.
|
For this project, I twisted the trunk up for about one inch, the two sections of wire are to be twisted into the primary limbs of the tree.
|
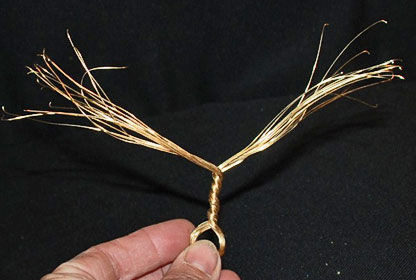
Holding one side/set of the wires out of the way, divide the other section and twist them together. Repeat on the other set.
|
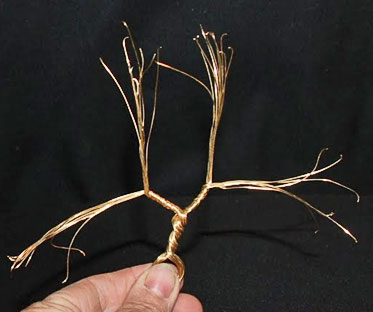
The above shows the tree with trunk and two primary limbs
|
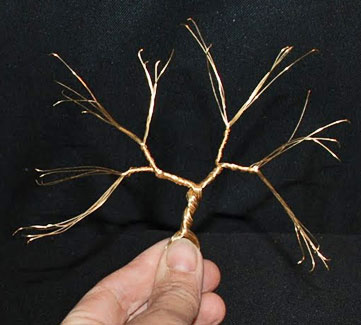
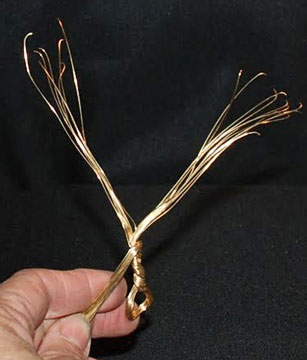
Once again, divide each section - you now have 4 sections of wire - and twist the secondary limbs as above.
|
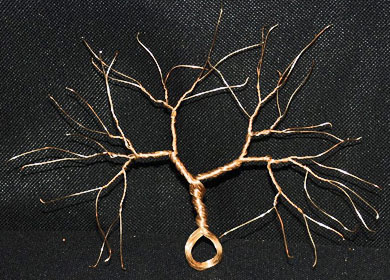
Continue to divide and twist each section of wire until they all end in single wires. Since I used 18 wires when those 18 are divided in half there are two sections of 9 (an uneven number). For this, I simply leave the odd wire out at an angle as I continue to twist the remaining wires out.
|
Flatten out the "roots" so that you can begin to form the limbs into the shape of the tree.
|
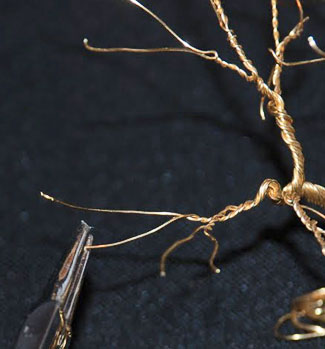
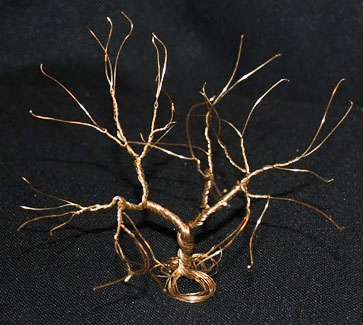
Using round nose pliers, grab the end and holding firmly turn the pliers to form a loop on the end of each wire (end of wire should be between the two ends of the pliers or your loop will not be a circle).
|
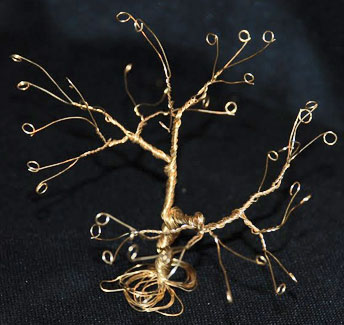
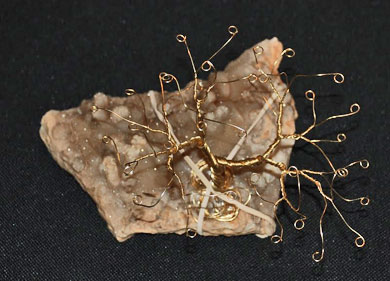
All ends looped
|
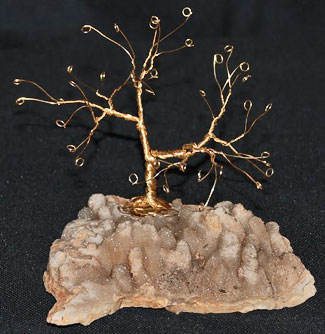
Dry fit your tree to the base rock deciding how and where you want it to sit.
|
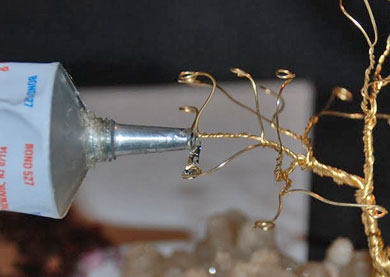
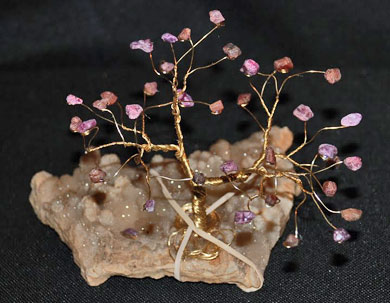
Place a good dollop of E6000 glue onto the rock and affix the tree into the glue - use a rubber band or two if needed to secure the tree to the base rock until the glue dries.
|

Turn each of the loops so that they are near horizontal - it is next to impossible to get your stones to stay put if they are not fairly level.
|
View of tree from above showing horizontal loops.
|
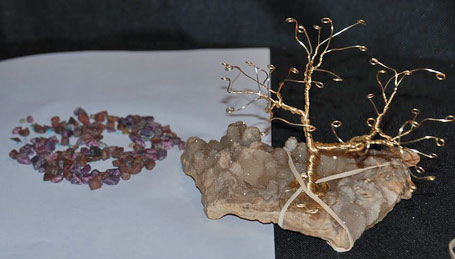
Choose the stones you want to use for your tree; placing onto a sheet of paper makes them easier to see and choose and returning leftovers to the container when finished.
|
Place a drop of the 527 (fast drying) glue to a loop.
|
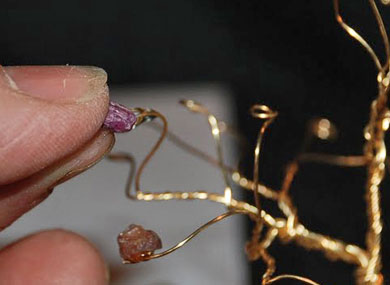
Place a stone onto the glue and hold for a second until it will remain there.
|
Glue a stone to each loop.
|
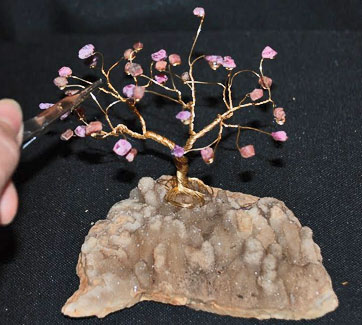
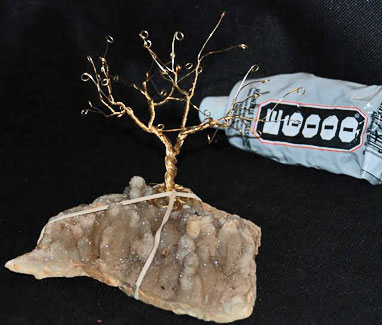
Once all the stones are placed, the base glue should be sufficiently dried and you can cut the rubber bands and remove them. Then, you can reshape your tree - it is very important that you do your re shaping using your round nose pliers only.
|