The following is a step-by-step lesson on how to make a basic wirewrap pendant. There are other methods and styles, but this is what I prefer to get a clean look with a secure fit. Numbers match w/ pictures.
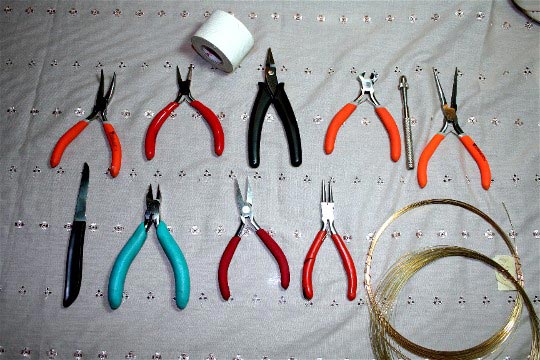
1. The tools that you need as a basic requirement are a pair of flat-nosed pliers, round-nosed pliers, wire cutters, and a small paring knife. All pliers need to be smooth-jawed. As you can see, I have more tools that I find helpful, but they aren’t required. Some wirewrappers will use nylon-jawed pliers, but I find them cumbersome. If you need to, wrap the jaws w/ tape to prevent marring the wire (I usually don’t because I don’t like the feel, but I control how hard I grip and I’ve been doing this for a while.). The best tape I’ve found for this purpose is fabric athletic tape, because it holds without leaving behind a sticky residue when you remove it. The wire I use is half-hard square and half-hard, half round wire. In this project, I used 24gauge square and half-round, but you might have an easier time w/ a heavier gauge square if you are doing your first project. I would not use heavier than 20 gauge square and 22 half-round, just for ease of working and appearance.
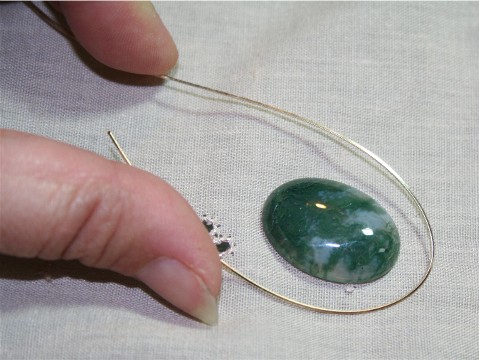
2. Take your cab and measure how much wire you would need to go around the cab, with 1.5 to 2 inches extra on each end (3 to 4 inches extra total). Cut a minimum of three lengths of square wire, but for this exercise I use four. I prefer four for strength and looks, but sometimes you might need more, based on the dome or thickness of your stone. Straighten somewhat (if necessary), by pulling them through your fingers while holding a cloth or paper towel.
3. Cut about 6 inches of half-round wire and using your flat-nosed pliers make a hook that fits snugly over the square wires, but would only hook over them about halfway when they are stacked together.
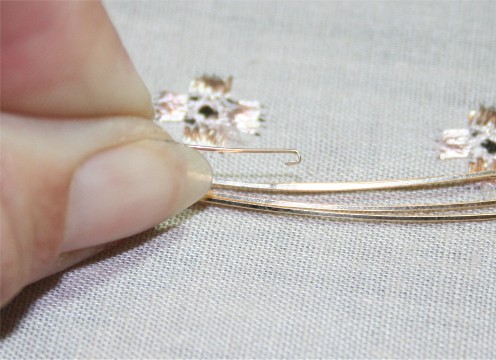
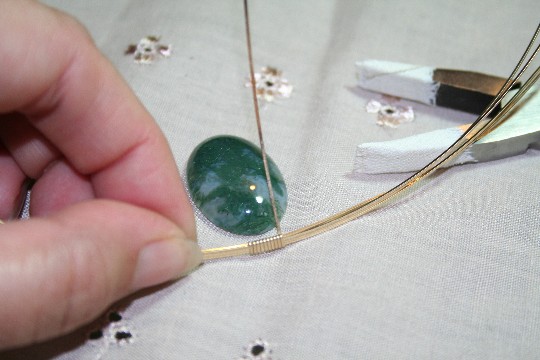
4. You may want to tape the square wires together. Take your square wires, stack them parallel so their faces are together. These wires will be the frame around your stone. Once your square wires are stacked, put the hook of your half round over the entire stack, approx. in the middle of the stacked wires.
5. Wrap the half round around the stack of wires, and snug it down w/the flat-nosed pliers. Slide the wire if you need to adjust it’s placement.
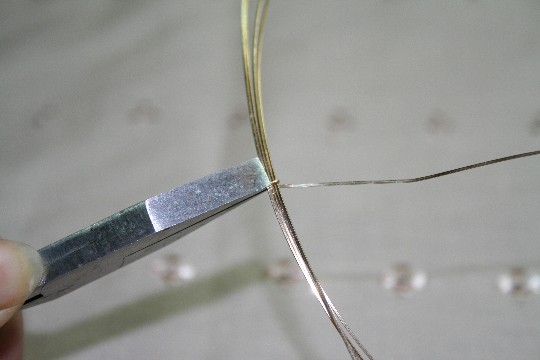
6. Make sure the fit is tight, using your flat-nosed pliers if you need to do so.
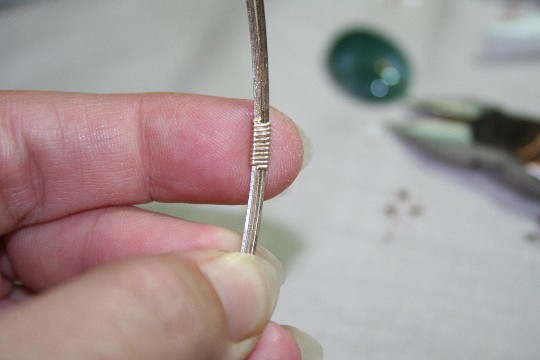
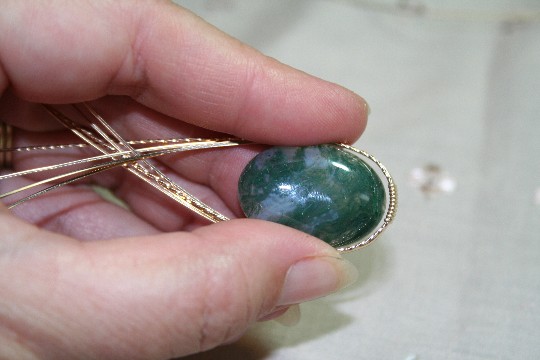
7. Continue the wraps around, making sure the fit is tight, until you have enough wraps to nicely cradle the bottom of the stone. Three wraps are the minimum I use for stability. I also snug the wire down after each wrap, using my pliers, to ensure a tight fit. If you used tape, you can remove it now.
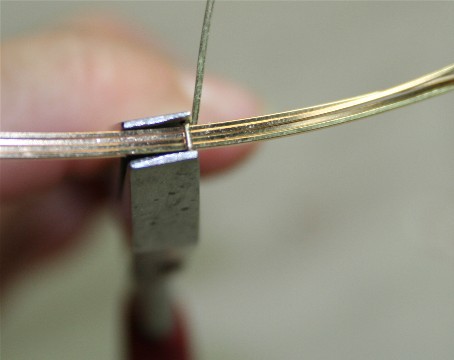
8. Cut half-round wire so that it ends in the middle of the stacked wires, on the same side as where you started. This view shows the “back” or “inside” of your work and will rest against the stone, hiding your loose ends.
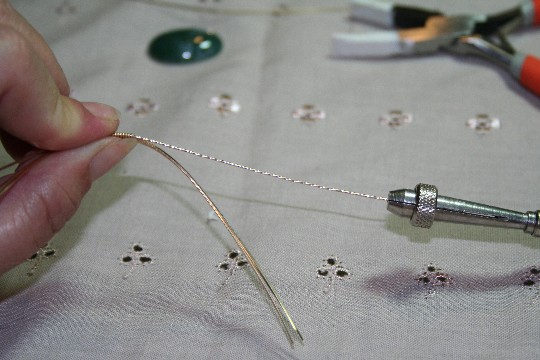
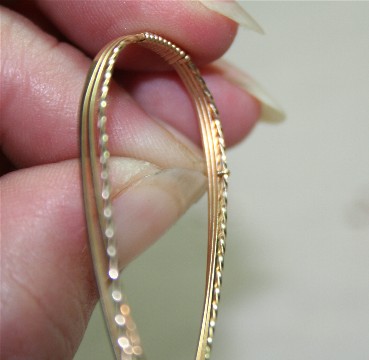
9. For a decorative touch, twist one of the square wires on the outside edge of your stack. I use a pin vise, but you can also use your pliers to do this.
10. You might want to support your wire where it comes out of the wraps while twisting, so that you don’t twist too much at the wrap and break it off. Make sure your twist is even and both sides match visually.
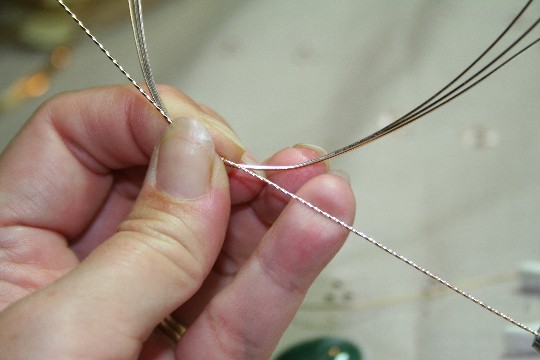
11. Fit the wires around the stone, using either your fingers or your round nose pliers to curve the frame. Figure out where you want the next set of wraps to be placed. Use a tape measure if it helps. For this stone, I will put one set on either side.
12. Make another hook in your remaining piece of half-round as before, and place it so the end is on the inside of your frame. Repeat as before, adjusting your placement before making the second wrap. You will find that the twist in the wire allows you to grip the frame more easily than before, but it won’t slide as easily, so try to get the placement as close as possible to start with. Do this for both sides.
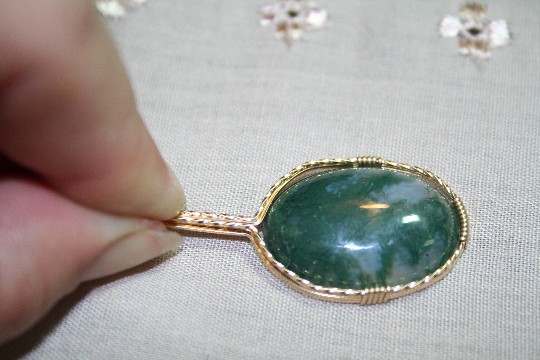
13. Fit the wires again, so the frame cradles the stone entirely, and the “inside” of your frame wires lie flat against each other without crossing. Use your round and flat nose wires as necessary to adjust your fit.
14. Make another hook in your half-round wire, this time long enough to reach to the bottom of your entire stack of wires and wide enough to fit over the double thickness of your stacked wires. Make sure that the hook comes over the top or “front” of your frame, where your twisted wire is. It is important that your wires remain in their stacks and meet evenly without crossing.
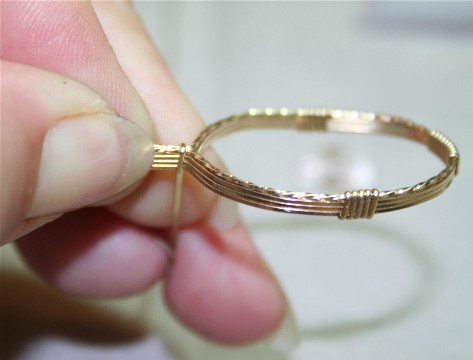
15. Make several wraps around your bundled wires to hold them together, and trim off so that the half round ends on the opposite side from where you started, and reaches to the bottom edge of your stacked wires. I use a minimum of three wraps around, but prefer four for stability. Snug down as needed w/flat-nosed pliers.